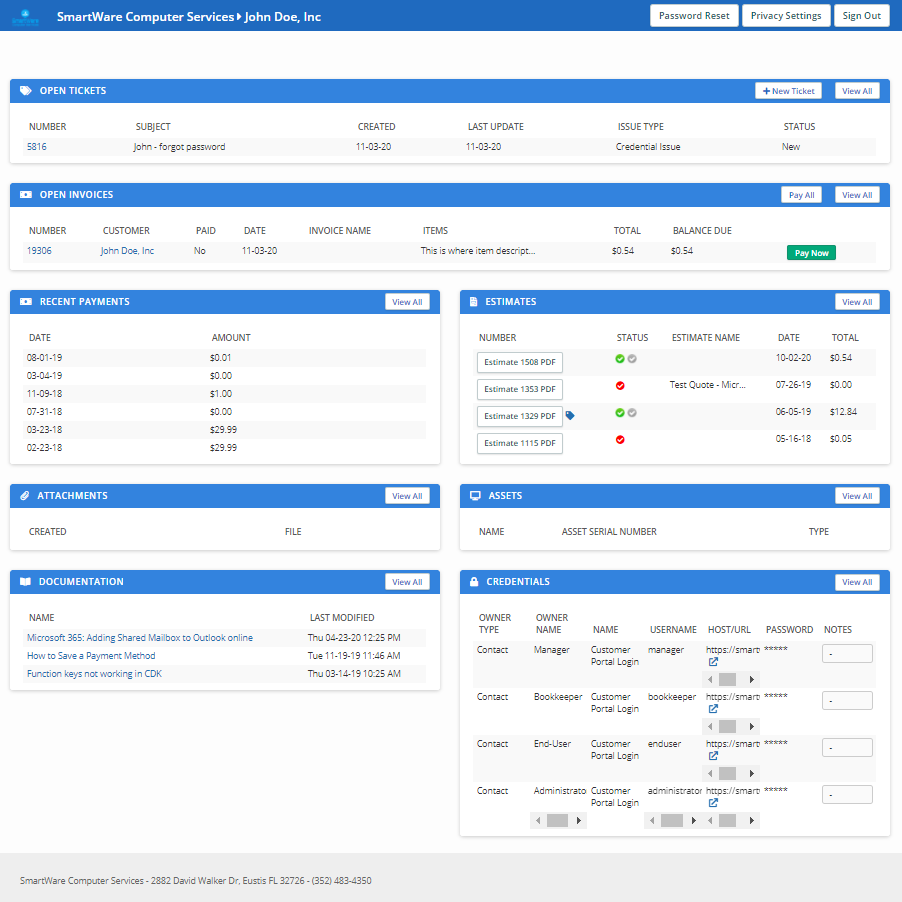
SmartWare Computer Services


Support Portal Information


Opening a Ticket


New Ticket Form

Enter Contact Info

When opening a new ticket, it is extremely important to provide your full contact information. This will help the technician assign your new ticket to the correct customer in out ticketing system. In addition, a technician will contact you regarding your ticket using the provided information. Failure to provide accurate contact information may result in a delay in service.


Enter the ticket details.

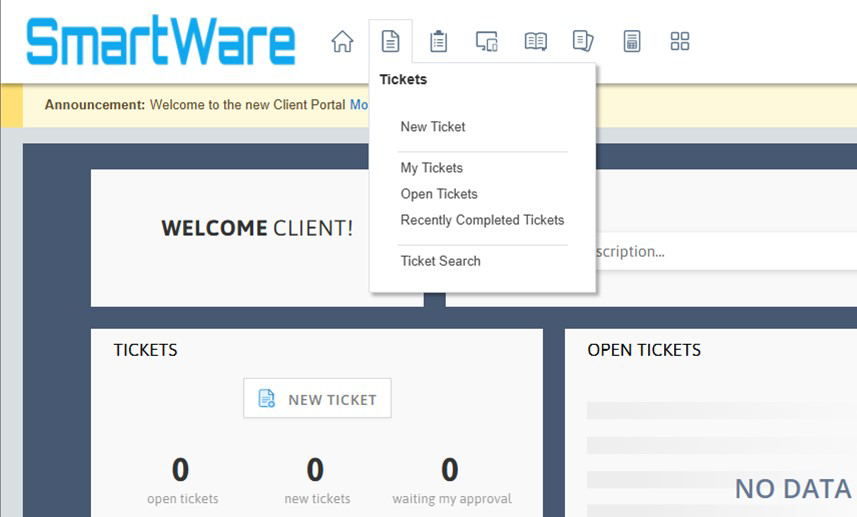
Enter Ticket Details


Provide as much detail as possible regarding the issues you are experiencing. Technicians respond to new tickets in the order they were received; however, we reserve the right to prioritize tickets based on the severity of the issue.

Issue Type: Select a predefined issue from the dropdown menu.
If you do not see an appropriate issue type, select "General Repair".

Subject: Provide a basic description of your issue using a few words as possible.

Detailed Description: Provide as much detail as possible regarding the issue you are experiencing.
If you are an employee of a business that has multiple departments and/or locations, it is helpful to include the name of your department and/or location for billing purposes.

Starting a Session


STEP 1

Click "Start a Session" to download the application installer.

Click Splashtop logo.


STEP 2

Click to open the Splashtop installer (exe file found in downloads).

Open the downloaded file.

Some systems may require an additional step to verify that the software is being downloaded from a known, safe source.
Confirm that you trust the download source and continue to Step 3.


STEP 3

Click "OK" to confirm that you are connecting to a trusted individual,
referenced by our email tech@scs3.com.

Click


STEP 4

Provide the 9-digit code to the technician to allow connection to your device.

Give the tech your 9-digit code.


Customer Portal Information


The Customer Portal is Your Dashboard

Administrator Dashboard

From the Customer Portal, you can view tickets, approve or decline estimates, view and pay invoices, and view assets associated with your account. For your security, we have several Permission Levels that can be assigned on a per-user basis in order to limit who access to your service and billing information.

The following permission levels are available:

Administrator
Full access to all portal features
May require admin approval.
Pictured Above.
Manager
Access to own credentials, invoice/estimates, payments
Access to all tickets, public documentation
May require admin approval.
Bookkeeper
Access to own credentials, tickets
Access to all invoices/estimates, payments, documentation
May require admin approval.
End-User
Access to own credentials, tickets
Access to all public documentation
Default permission without admin approval.

MARS Client Support

As a Managed Antivirus-Remote Support client, accessing basic services is right at your fingertips.

Click the caret icon on the start bar (far right near the date and time) to open the system tray.
Then, click the little blue wrench to see the MARS menu options. Click the wrench icon in the system tray menu.